Introduction
This activity was designed to further our surveying techniques by using a total station which captures z points (elevation) along with x and y. Previous surveying techniques only gather X and Y points, however gathering elevations may be very useful and important in some cases. This lab taught the class how to set up a total station, gather points using the device, and import the points on to ArcMap to view the results.
Methods
The first step of the assignment was to learn how to set up the total station and collect points. The total station was brought out to University of Wisconsin Eau-Claire's campus mall. A 1 hector square was the goal to be surveyed around campus. In figure 1 below the total station is placed on a tripod and pushed into the ground by stakes. It is very important that the total station is level for surveying purposes. The legs can be adjusted and levels are on the total station to see if it is even.
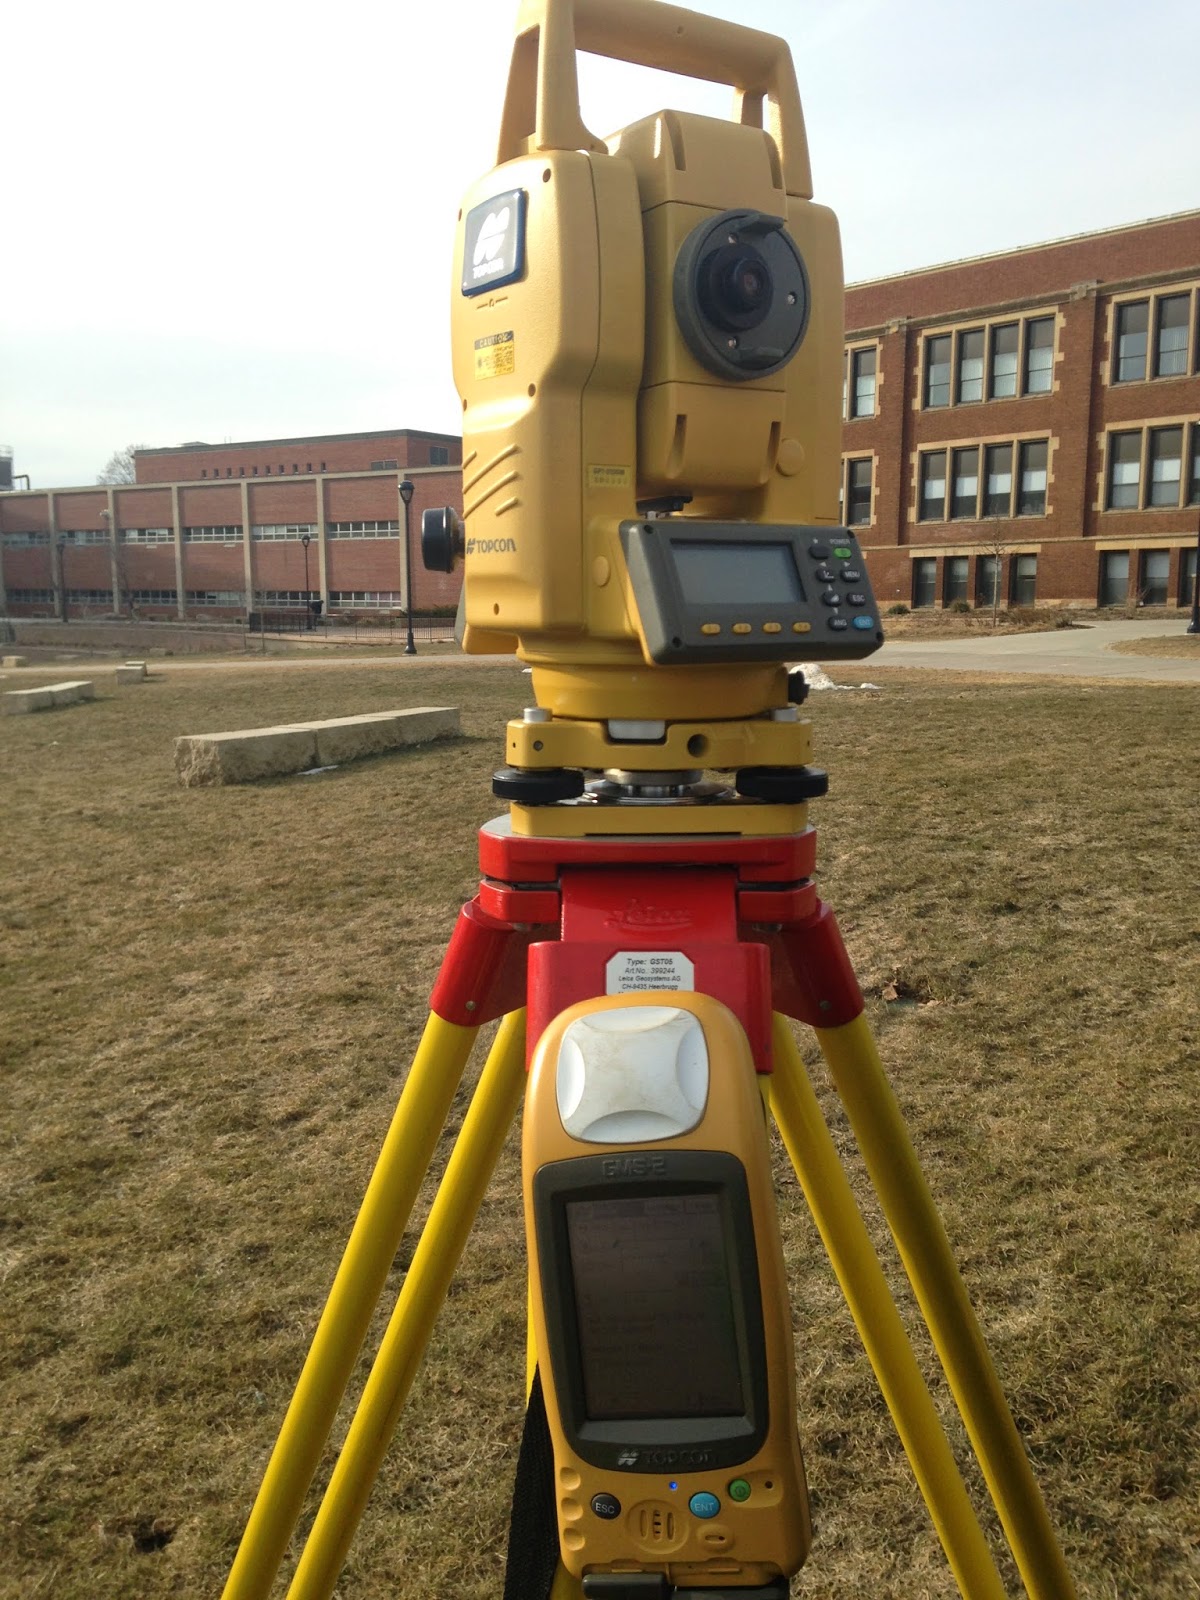 |
| Figure 1: Total station set up on campus ready to be used to survey. |
In the GPS unit data collection was chosen to start the set up of collecting. First a new job was created. In here the setting can be modified to fit the specific needs of the collection. Group one was entered for the name of the new job. The coordinate system "UTM Zone 15 north NAD 83 was chosen because Eau Claire falls under that zone. Meters was selected for distance, Gird for coordinate type and other settings were selected a step by step can be seen below created by Joe Hupy our professor.
1.
Set up Blue Tooth
a.
Turn on the total
station.
b. Turn on the station Bluetooth. This is done within the menu area, and within the parameters portion.
c.
At this point,
you will not see a Bluetooth symbol appear on the TSS. This will appear after
you set up the TopSurv Job.
2.
Set up TopSurv Job
a.
Set up TopSurv
Open up TopSurv (if no short cut appears find the EXE in the Flash Disk by
clicking on My Device from the home screen, then flash disk, and then TTS
folder)
b.
If TopSurv has
icons instead of menus click the Topcon Icon in the upper left corner and
Switch Menus
c.
Inside TTS - Make a new job
i.
The open job menu
will appear
ii.
To make a new job
click new
iii.
To type in a name
click on the space and a keypad will open up
iv.
Click next choose
My RT DGPS for GPS + Config and My Reflectorless for TS config.
v.
Set the
projection accordingly.
1.
If you are
planning to enter the coordinates in manually from a different GPS unit you need
to choose the same projection as the coordinates that you have from the other
unit.
vi.
You may also need
to change the datum (ex if you are using UTM N 15 NAD 83).
vii.
Do NOT check grid
to ground
viii.
Set the Geoid to
the first one that is in the list. Click
next.
ix.
In the units menu
set your distance units to meters and choose whatever else you want for temp
etc.
x.
Coordinate type
will be Grid, coordinate order should be Easting, Northing, Ell Ht. leave the
rest.
xi.
Turn on alarms if
you wish.
xii.
Finish
d.
The blue tooth
manager will appear. Select the GPT (TSS) then choose select. It should connect
to the GPT. The blue tooth light on the GMS-2 should be blue indicating that it
is connected.
e.
You may need to
go to the Job Menu, and go to Observation mode. Select Total Station. You could
select GPS if you were using the GPS + a LAZER.
f.
If a window pops
up asking you for codes
i.
Type in the
following codes for
1.
The key value
should read 2951612344
2.
TS: 142601006
3.
GIS: 142601214
After following these steps to set up the job the next step is to collect a back sight point and the OCC point. The OCC point is to let know the device where they are located in with a lat and long coordinate. After collecting the OCC a back sight needs to be created. A back sight is used to let the total station know where north, south, east, and west are located. Without a back sight the collected points would be floating somewhere in space. After collecting the back sight the total station can now use that point in reference to all the other points collected. To do this follow these steps below:
1.
Collect GPS points with the GMS2 in TopSurv*
a.
From the Job
menu, go to Obs mode
i.
Check GPS+
b.
Then go to
collect menu, and collect features
c.
The point will
auto label OOC1 – keep tract of this as
you will need the name again
d.
Place the GMS2-s
over the laser point for the OCC. and click start. The GMS2 will begin logging
points.
e.
If the GMS-2 will
not log points, click on the settings button and the top and choose solution
type DGPS, Auto. You can also set the number of positions to be averaged. This
can also be set from the job configuration menu.
f.
Once you have
collected enough points for a position for the OCC you can click accept.
If you wish to also
record the location of the BS at this time you can follow the same procedure.
*Both the occupied point and the Back Sigh (BS) are as
accurate as the GPS unit you are using. If you wish to attain higher accuracy,
it is recommended that you use a separate GPS unit that averages a high amount
of points as the information you enter
2.
To begin the OCC/BS setup
a.
Go back to the
job menu, observation mode, and choose Total Station. Then proceed with Step 8
(skip step 7)
3.
If you have X,Y coordinates from a different GPS unit
and you wish to add the OCC/BS points in manually then:
a.
From the edit
menu go to points.
b.
Click on Add
c.
Then click on New
d.
Name your point
accordingly (ex. OCC1). Type in the coordinates you obtained from the GPS
unit. These MUST be in the same
coordinate system AND Datum as the settings from the GPS unit.
e.
Click finish.
f.
Repeat for the
BS.
4.
Set the OCC and BS.
a.
Go to the Col
menu, choose OCC/BS setup.
b.
If OCC/BS does
not appear in the menu check the File menu, Observation Mode and be sure it is
set to Total Station.
c.
In the BS setup
tab, in OCC spot click, on the drop down menu to the far right and choose from
list the point for the OCC (either that you collected with the GMS2 step 6 or
added manually step 7).
d.
Choose the point
where the TSS is located – the OCC point you entered in the previous steps
e.
Then set the
height of the instrument by measuring the to the mark on the TSS from the
ground up
f.
Then set the
height of the prism from the rod
g.
If you wish to
enter the BS point from the list
i.
Then be sure the
button next to the pointing figure says BS Point, if it says BS Azimuth click
the button and it will change to BS point.
h.
Use the pull down
menu to find the BS GPS point (same way you did with OCC). Select that point.
i.
Then sight the
TSS to the BS. You do not need the prism on the BS you just need to have the
TSS sighted in the exact direction of the BS.
i.
FYI if you want
to put the prism on the BS – no harm will be done
ii.
FYI if measure
dist to BS is checked then the prism must be at the BS and the TSS will shoot
the BS.
j.
Once the TSS
is sighted to the direction of the BS then click HC set. The BS Azimuth will
then be set to zero even though it is not north. This is OK because the
software/TSS automatically does the calculations. This is so everything is
relative to the angle between those two points.
k. If you wish to use BS Azimuth
i.
Orient the total
station in the EXACT direction of the BS and enter in the angle from north for
the BS. You can use a compass or laser find to measure this angle. The follow
step j above.
l.
You are now
actually ready to collect data.
After the the OCC and Back sight are collected the collection is ready to be started. In this survey a topographic survey of campus mall was done. A total of 109 points were collected by our team around an hour. To collect the points the total station uses a laser to find the prism pole, figure 2, one of our groups members was holding out in the field.
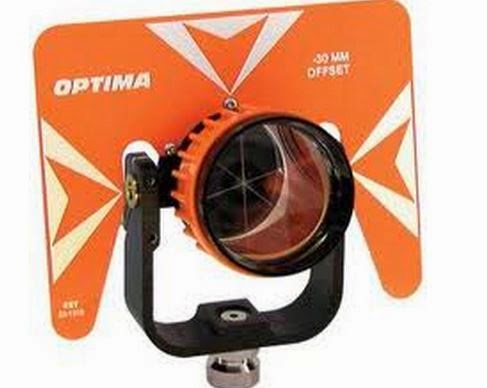 |
| Figure 2: Photo of a prism, similar to the one used for the collection. |
To survey one person needs to be at the total station looking through the total station lenses and finding the mirror on the prism. The total station then uses the laser to locate the prism in terms of X,Y, and Z coordinates. When holding the prism in the field it is important to keep it as straight as possible and collect an array of points. If an area is relatively flat it is not needed to collect a lot of points in the area because the elevation does not change. However, when the elevation does change drastically in an area a lot of points need to be taken to cover the elevation change. In our data collection the land was relatively flat except for the area down by the river. However, a lot of points were collected for practice.
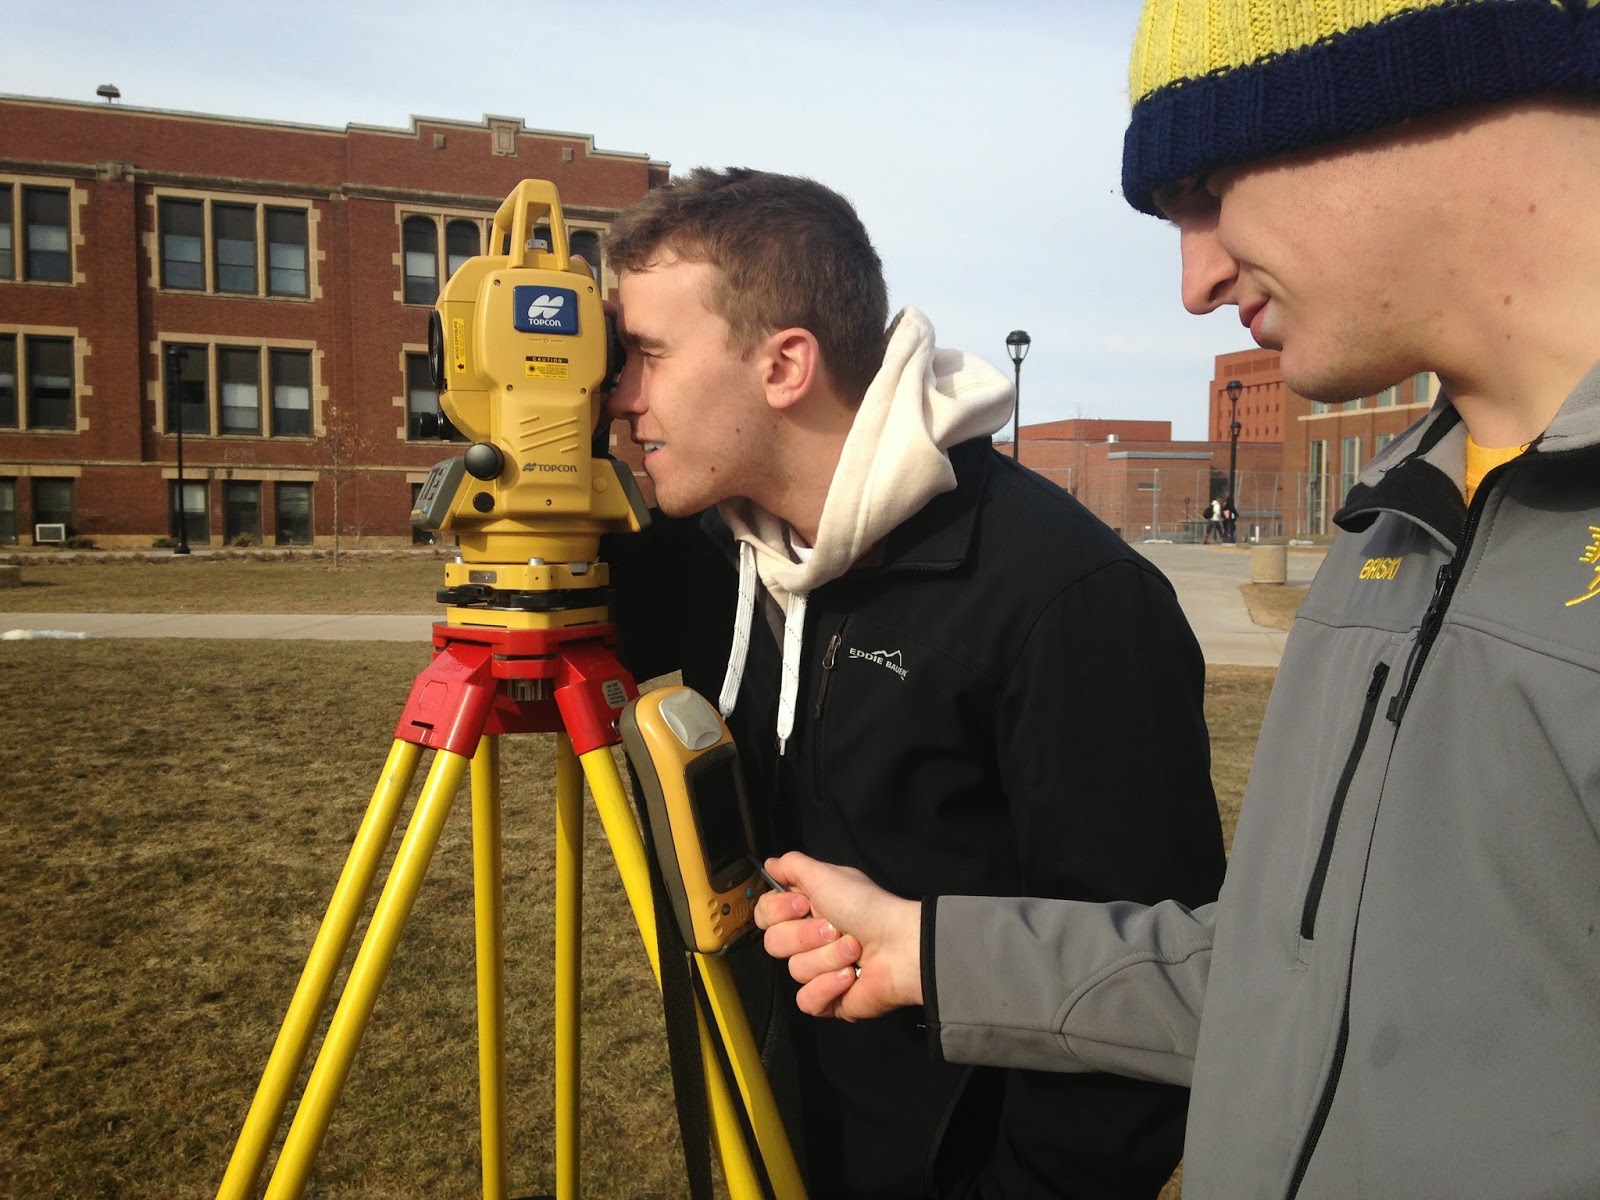 |
| Figure 3: Image of me looking through the total station lens trying the find the prism. Drew is ready to hit the collect button on the GPS once the total station and prism are matched. |
 |
| Figure 4: Image of me finding Andrew holding up the prism. As you can see he is about 50 meters away wearing a black shirt. The total station has very good optics so finding someone at a distance is easy. |
1.
Collect Data
a.
Go to the Col
menu and choose observations.
b.
Then click measure
once the TSS is sighted to the prism. Continue to do this and make sure that
the point’s id numbers are increasing.
c.
If you wish to
verify the data, go to edit and list and look at the points you collected. You
can also view these points on the map tab
d.
Continue
collecting data.
e.
Be sure that if
you change the height of the rod you must enter the new height of the rod into
the collection screen for each point.
After the collection is over the next step is to add the data onto ArcMap. One problem that occured when bring the points into ArcMap was that they were flipped. To unflip them the rotate tool was used so the points were in their correct positions.
Results
The results of our surveying turned out well. The amount of points that were collected worked out and gave us a good read of the elevation on campus. However, I wish we would have surveyed more points down by the river to really see the elevation change down there. The land surveyed was relatively flat making it easy to survey and the results don't look as cool when the land is flat.
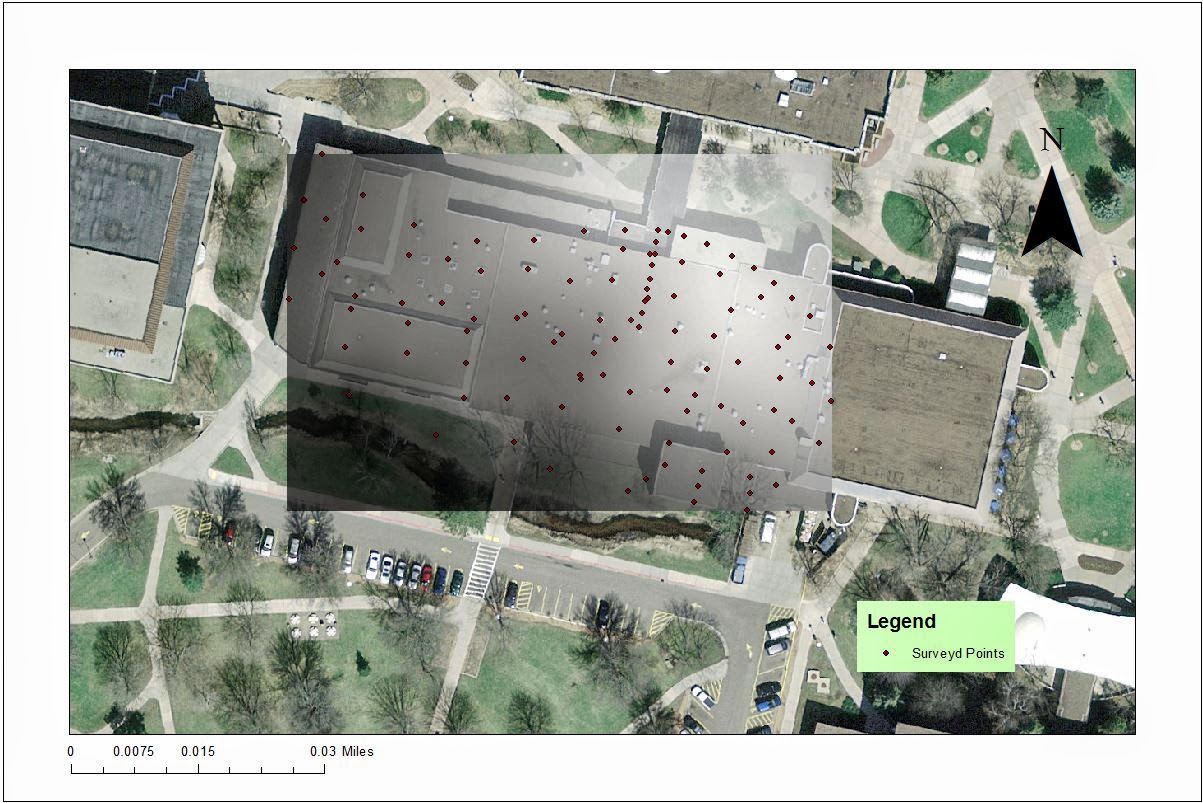 |
| Figure 5: 2D result captured on an aerial image. I could not find an updated image as the building on our points does not exist anymore. The black represents low elevation while the white is high |
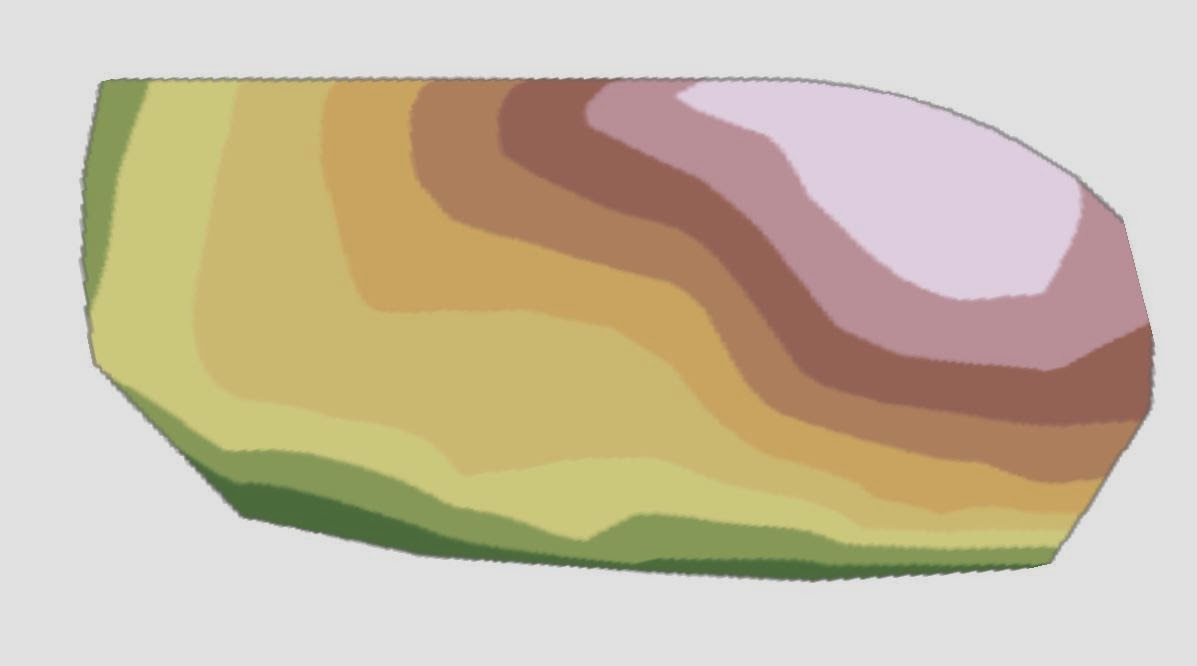 |
| Figure 6: This is also an image of the points collected using ArcScene. Natural neighbor was applied to the points resulting in the white being high elevation and the green being low. |
Because of the area we surveyed and the elevation not changing much it was hard to get a 3D picture of the elevation. When using an interpolation method in ArcScene the result would be flat, there for not being able to see a change in elevation.
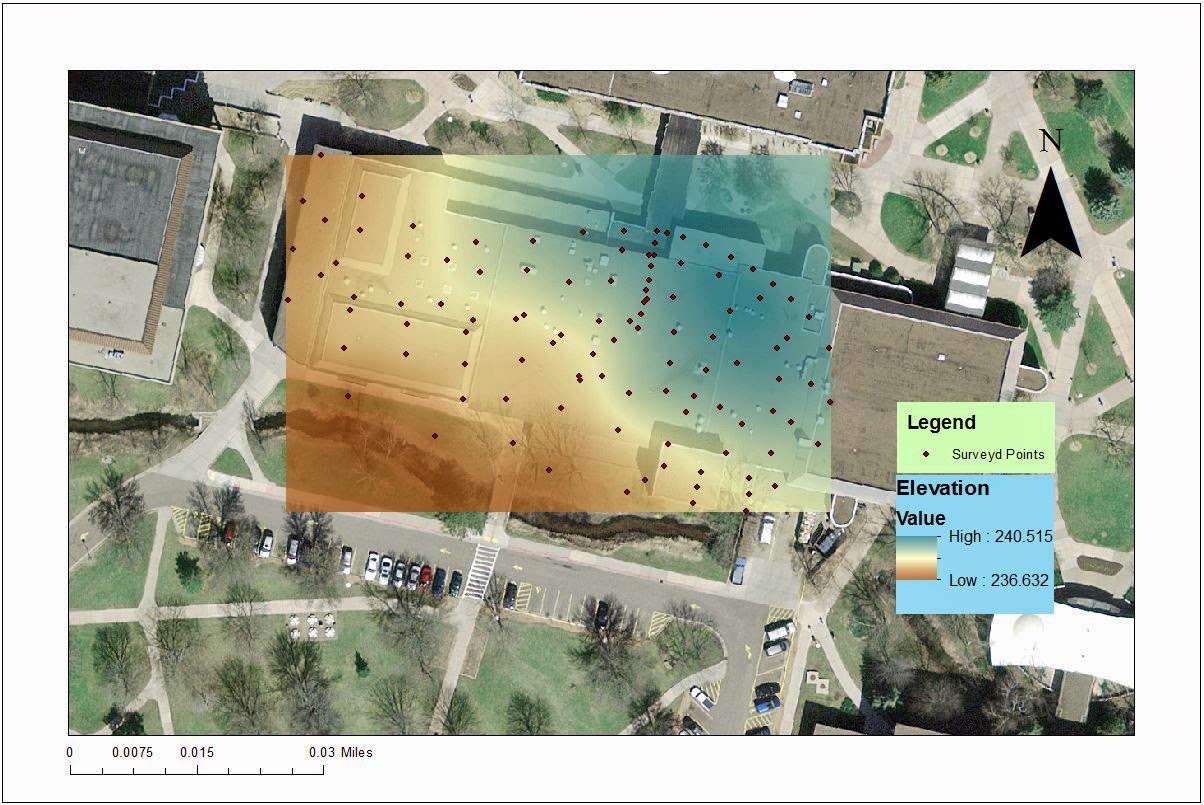 |
| Figure 7: A final cleaner map of the points collected. This color scheme makes it easier to read where the low and high elevations are. |
Conclusion
My group worked very well together when collecting the data. The collection went fairly quick as I have had experience with a total station before allowing me to find the prism at a quick rate. We had trouble setting up the GPS with switching modes to be able to collect the back sight and OCC point. Once that was taken care of it was easy rider after that. I would have liked to survey a place that had a greater change in elevation for a better looking 3D map and better practice when collecting an area with great elevation change.